Showing posts with label How to.... Show all posts

January 09, 2017

Installing HID conversion KIT on Peugeot 208 GTi

HID for automobile use needs projector lens. Fortunately, all Peugeot 208 GTi in Malaysia come with light-guide projector low-beam headlamps as standard. There will be no issue as long as the light color temperature is 4700K or less. If you are new to the High Intensity Discharge (HID) lighting for automobile use  read this first.

Installing HID conversion kit on Peugeot 208GTi is straight forward. Just Plug n Play.

1. Get the right HID Conversion Kit of your choice ready.
This one costs around RM80 @eBay from Hong Kong. It makes me wait for about two weeks.


2. Locate and remove splash cover behind low-beam compartment.

3. Cut approx. 1" diameter hole through the splash cover for the wiring harness.

4. Place wiring harness in position. Use silicon sealant around the wiring boot to prevent moisture/splash from getting into the lighting assembly.

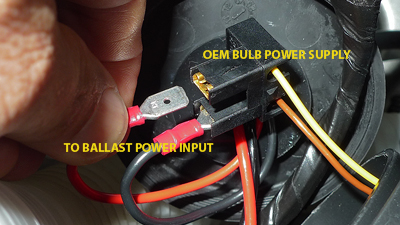
and then connect all wires accordingly (12v and HV). No cutting is required. Just plug n play.

5. Replace the factory-fitted halogen H7 with the new HID bulb.

Close back the splash cover. Secure HV power supply in position. DONE!


October 06, 2014

How To Repair A Broken Turbo Air Intake Hose

If you have a car powered by EP6DT type of engine, the time will certainly come when your air intake hose breaks apart around the turbo flange. Some if not all authorised@auta-rised service centers may charge you up to around RM500 to replace it if the warranty was voided/expired.

Actually you don't have to spend that much because it is quite easy to repair by yourself (it will take you in less than 30 minutes) if you already have the following items...

(Rapid Araldite (epoxy rasin), Black RTV Silocone, Super Glue, PTFE Tape, Cloth Tape/Strip (1/2" x 6") and flat/matte black paint spray-optional).

The following simple steps show in details how I repaired the broken hose on a Citroen C4 Picasso.

1. Clean the broken portions of the hose...
and then stick them up together back in place using super glue.

2. Apply a thin layer of epoxy resin around the outside surface of the damaged part of the hose.

3. Wrap around with a layer of cloth strip before the resin is set. Do NOT use fiberglass cloth.

4. Apply another layer of epoxy resin on the cloth which already wrapped around the hose end.

5. Apply a thin layer of black RTV silicone on the inside surface of the hose to improve air tightness.

6. Wrap around with three layers of PTFE tape...

7. Spray two or three coats of flat/matte black paint on the PTFE tape which is already wrapped around the hose in (6).


QED!

February 18, 2014

Time to replace Diverter Valve or Blow-off Valve (BOV)...

After solving knocking problem, another one popped up. There is no more typical turbo blow off "phishhh..." sound coming out of my308. I already suspected something went wrong within the BOV.


When it is opened up for inspection I got something like this...

Is this plastic component (a sleeve) purposely designed to fail as shown in the picture ? Looks like it is made of brittle recycle plastic.

Unlike exhaust wastegate, this intake BOV is not subject to extreme temperature so I tried to "McGyver" using superglue and reinforced with Rapid Araldite resin as shown...


....  it works and produces higher pitch "phisssssheeew..." sound now. Nonetheless I think it won't last long, sooner I have to replace it with better components similar to those used on VAG 2.0 TFSI BOV. 

Already ordered @eBay. According to eTuners...  internal parts of stock PSA BOV are interchangeable with the one designed for VAG 2.0 TFSI (part no. 06H 145 710 D) which is also made by the same company, Pierburg.

Find out more HERE.

Knocking 308 engine? The remedy could be very simple...

Lately my308 has developed knocking or pinging sound during hard acceleration at speeds around 50km/hr. The problem persists even after using RON97 fuel! So far, for almost five years there was no such knocking even running on RON95 fuel.

I used eTuners Lionheart software for diagnostic (free download HERE). It tells there is "super knocking" but short of showing up the cause. (what more I can expect frm a FREE stuff, anyway?


When the car was sent to local autArised service centers/garages for advice - they either suggest to do top overhaul to remove carbon built-up or to the extent of  replacing the timing chain solely based on fault code P1385.

Alternatively, after googling around finally I got an advice to check whether knock sensor is faulty and I was guided to a site How to Check a Knock Sensor for Continuity . 


Surprisingly... the advice was right (no autA punyier). After replacing the knock sensor at RM350 (USD100+) the problem is solved like magic... 


... and now not only I can save from  unnecessary sky-high repair expenses but I can still enjoy lower-cost RON95 fuel. So far so good. Sprinting away from traffic lights is still a fun like before... :)

February 12, 2014

How to Install ELM327 and OBD2 Software

Got problem with your ELM327 interface but feel shy to ask? ... take a peep HERE - whatever mode of connection (USB, bluetooth, etc..). Nobody is watching ya.


January 17, 2013

Peugeot 308 DIY Oil and Oil Filter Change

Not everybody knows exactly where the oil filter cartridge housing is located.

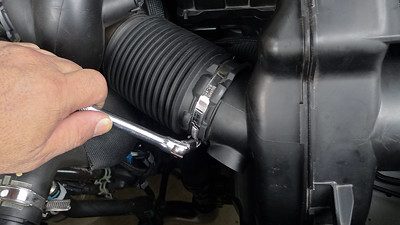
It is actually hidden underneath air intake flexible hose.
03
In order to locate the oil filter cartridge housing the resonator must be removed first (after detaching it from the flexible air hose).
04
After removing the resonator lift up the flexible hose to locate where the oil filter housing is.


Items and tools required for oil and oil filter change.
The oil filter cartridge housing can be removed with 27mm socket wrench. Oil drain plug needs 8mm allen key (not shown).

Fresh oil filter cartridge in its housing.

For those who have never DIY engine oil change please follow step-by-step procedures HERE.

How to reset Service Indicator
After changing the oil and oil filter the service indicator must be reset as fallows...
1. Turn off the ignition
2. Push-and-hold trip-meter reset button.
3. Still pushing the trip-meter reset button turn on the ignition (do not start the engine)
4. On the display will appear count down from '10' to '0'
5. After the display read '0' the service indicator (spanner icon) will disappear.
6 Switch off the ignition.
7. Done!

January 29, 2012

Brake bed-in Procedure

(updated on Feb. 1st 2012)

Before bed-in
New brake pads and skimmed rotor were installed in place.

In order for the new brake set to work at its best, the rotors and pads should be properly bedded-in. This process can also be called as "brake conditioning", or whatever terminology.

Proper bedding improves pedal feel [no "on-off" braking feel], reduces or eliminates brake squeal, prevents and cures brake judder, reduces brake dust, and extends the life of pads and rotors.

If you Google around, you will find different procedures for brake bed-in. You may follow any of those procedures but I've got my own way of doing it. You don't have to follow my way but you can take a peep... :)


myProcedure for Bed-in

Bed-in procedure can be annoying to other drivers so I had to perform the bed-in around 4:00am to 5:30am in two sessions during which time there is virtually no other vehicle on the road.


1st Session

Drove and accelerated the car to approximately 80kph and then applied the brake lightly until the speed dropped to around 20kph in 100m. Then accelerated back to 80kph and maintained the speed for 1 minute and then applied the brake lightly again. Repeated 10 times without completely stopping the car. After 10th braking, drove the car slowly for another 5km to cool down the pads and rotor before stopping.

Stopped the car for 30minutes to almost completely cool the brakes.

2nd Session
Repeated Session 1 at 110kph

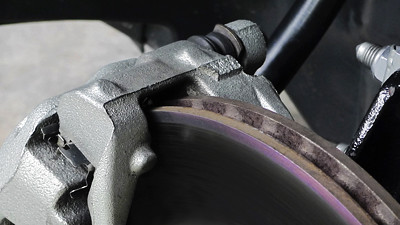
Here is the result after the 2nd session...

... there is a slight blue tint on the rotor [disc] surface which is not in contact with the pad and a light grey film on the surface which is in direct contact with the pad.


The blue tint tells the rotor has reached break-in temperature and the grey 'coating' is the by product of the chemical reaction between pad material and the rotor under extreme temperature and pressure. This layer enhances adherent friction hence minimizes squealing, increases braking torque, and maximizes pad and rotor life. Without which the braking force depends solely on abrasive friction.


3rd Session
For the 3rd Session, the car was driven 122km non-stop. During the first 50km the car was driven and braked normally in order to "bake-up" brake pads and rotors gradually and maintained the temperature and then performed THREE hard braking from around 120-140kph down to 20kph .

Fully baked rotor with near perfect transfer-layer* formation...
*click HERE to find out what transfer-layer is all about and its significance.

4th Session
This was the final session. The car was driven for 382km at 'normal speeds'. Four times hard braking to dead stop was performed during the trip at approx. 50km interval. Braking performance was excellent. The best ever! Silky smooth but sure and firm. Adherent friction is superb.

Rotor condition after brake bed-in [conditioning] process was completed...
Brake rotor bed-in

January 27, 2012

Taking a Brake...

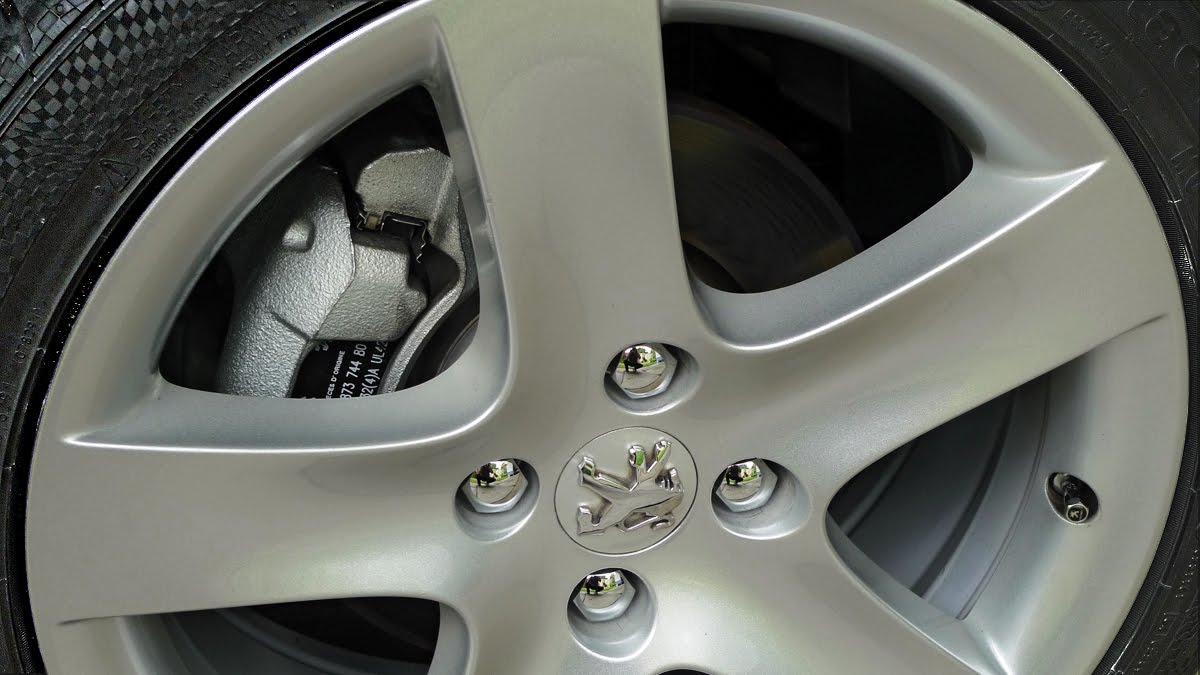
MyPeugeot308 is almost 3yrs OTR and has just clocked 50,000km. Prior to the scheduled service it is the right time to replace front brake pads even though all pads are still usable up to at least 6000km more.

comparison between worn-out and fresh front brakepads

Why 6000km more?
The answer is because the remaining pad thickness is still more than 1 mm above wear limit. For instance, by measurement the average brake pad consumption is around 1 mm/6000km. This guide is valid for genuine pads and only if 308T is not driven on busy streets [or in towns/cities] where the right foot is spent more time on brake pedal than on the accelerator!.


Ready for the installation.
There is not much wear/damage on the stock rotors even after 50,000km of 'abuse'. A little skimming job is good enough to 'recond' them.
I still prefer genuine brake pads.

DIY Installation is complete...


Click HERE for more info on brake pads/discs and to see how to remove them.

December 14, 2011

How To Retrieve Trip Log from Garmin 2575R

  1. Connect the GPS set to a pc/laptop using provided USB cable
  2. Turn on the GPS then select "Mass storage mode"

  3. Open mapping application such as Mapsource from the pc/laptop then click "Receive from Device" icon. When Dialogue box appears select the right device from the pull-down list.
  4. Select "Tracks" under "what to receive" and then click "Receive". When "Transfer complete" dialogue box appears click OK. Done.
  5. List of track logs can be found under "Tracks" tab. Double click on any "Active log" from the list to view "Track Properties" where you can retrieve trip data such as date, time, speed, altitude, latitude, longitude, ...etc.
  6. If you click "show profile" you will see the vertical profile for the entire track.

March 25, 2010

How to Align Peugeot 308T Headlight Beams

Light beams should be realigned every time after bulbs replacement to avoid causing a nuisance to other road users . The only tools required are 6mm allen key and 8mm socket wrench c/w ratchet handle.

LH and RH headlamps can be adjusted individually for beam height and L-R alignment.

1. Beam Height Adjustment.
Beam Height Adjustment can done by using a 6mm allen key on the adjuster as shown in the picture.
Turn the allen key either clockwise or counter-clockwise until the desired height is achieved. RH beam should always be lower than LH beam height. Repeat for another headlamp. Finally adjust LH and RH beam height simultaneously by using the remote height adjuster below steering column.

2. Beam Alignment.
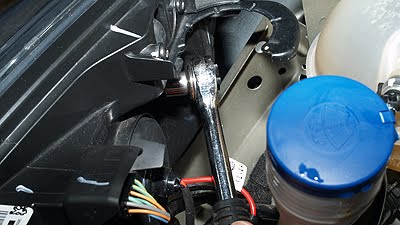
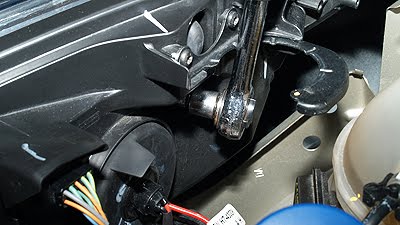
Beam alignment adjuster is actually hidden. Must locate where is it first. Even some mechanics at authorised SC who are not familiar with 308 don't know where is it!
Use 8mm socket wrench with a ratchet handle to turn the adjuster clockwise or anti clockwise to align the beam.


Screwing in [turning clockwise] the adjuster will align the beam closer to the car axis.

beams on the wall after realignment
UPDATE: Even though the alignment was done, the light beams are not 'friendly' to other road users because of the glare - worse still after installing HIDs. Finally I installed Projector Lenses to reduce glare and to improve light beam focusing.

| HOME | HID | Osram Nightbreaker | LED | All Light bulbs|| Fuel Consumption | Performance | uncle's DIY |
|Car Size Comparison | Motoring Myths | RON95 |

March 23, 2010

How to install H7 HID conversion kit on Peugeot 308

Step 1
HID conversion kit installation begins with the HARDEST step, i.e choosing and picking out the right HID kit - there is a large range of HID kits to choose from - costing less than RM150.... to more than RM1500 per pair! The choices are also depending on personal preferences and needs - such as color temperature and brightness.

For some people [especially ahbengs], appearance plays a large part in their purchase, and they might wish to purchase a HID conversion kit with HID lights of special colors. But take note the highest LEGAL color temperature is 4700K.
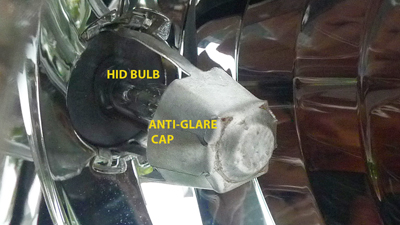
Next, make sure the kit will fit in the car headlamps properly. Some H7 anti-glare caps are designed to prevent insertion of HID tubes because the reflectors are not designed for them - Not all HID lights are compatible with all Peugeot 308!. Must check the width, height and depth.
ANTI-GLARE CAP
the dome-shaped anti-glare caps of different type
Some Peugeot 308 headlights cannot accept standard 45mm H7 HID tube [restricted by the anti-glare cap design] . However there is H7RC HID measuring only 40mm .
Once the right HID conversion kit has been decided the installation can be very simple if u know how to replace the H7 bulbs and understand simple electrical connections as shown in the figure.

Step 2Remove the OEM headlight bulbs [not easy if u don't know the mechanism]
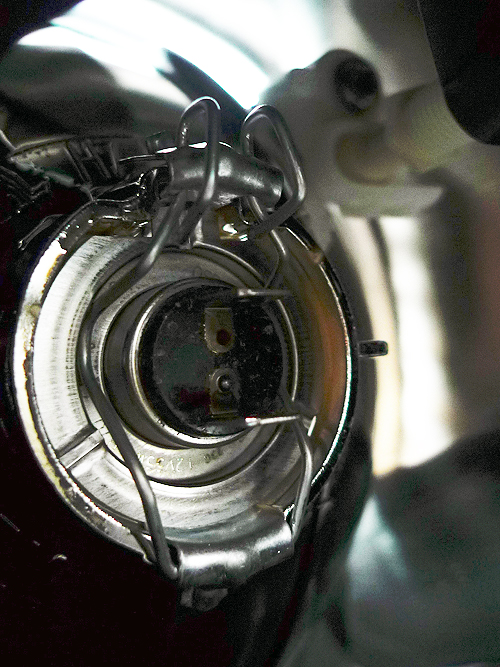
H7 lockpins
On 308 the locking pins for the H7 bulbs cannot be seen, u only can feel to push and spread the pin legs apart in order to remove the OEM bulbs before inserting the HIDs.

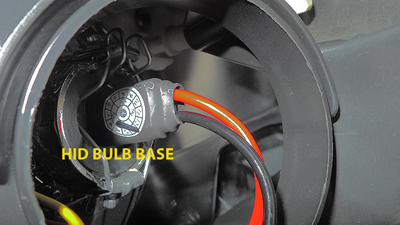
Step 3Replace the OEM headlight bulbs with HID bulbs.
HID BASE

Step 4Plug the HID bulbs high voltage leads into the ballasts HV connector provided with the HID kit. Test the HID ballast wiring for length, as HID lights use special wiring that cannot be extended.
HV CONNECTOR

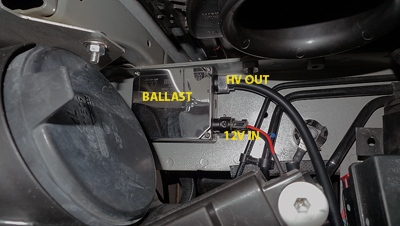
Step 5Mount the ballasts as close to the headlight bulbs as possible. Use double sided tape to mount the ballasts securely to flat part of the chassis below the head lamp assembly.
BALLAST
Do not mount the ballasts else where otherwise they will be exposed to excessive amounts of moisture or heat. Once mounted, connect the OEM headlight harness [females] to the ballast input power supply [red and black wires] to trigger and power up the HIDs.
SUPPLY LINE

Step 6Test the HIDs for proper operation. It may take up to a few seconds for the bulbs to illuminate completely.
A1220502HIDss

p/s you don't have to follow the old steps anymore!


Read also | Beam Regulation | HID Headlamp Page|


Last 7-day Most Viewed Pages

All-time Most Popular Posts