Showing posts with label DIY. Show all posts

January 09, 2017

Installing HID conversion KIT on Peugeot 208 GTi

HID for automobile use needs projector lens. Fortunately, all Peugeot 208 GTi in Malaysia come with light-guide projector low-beam headlamps as standard. There will be no issue as long as the light color temperature is 4700K or less. If you are new to the High Intensity Discharge (HID) lighting for automobile use  read this first.

Installing HID conversion kit on Peugeot 208GTi is straight forward. Just Plug n Play.

1. Get the right HID Conversion Kit of your choice ready.
This one costs around RM80 @eBay from Hong Kong. It makes me wait for about two weeks.


2. Locate and remove splash cover behind low-beam compartment.

3. Cut approx. 1" diameter hole through the splash cover for the wiring harness.

4. Place wiring harness in position. Use silicon sealant around the wiring boot to prevent moisture/splash from getting into the lighting assembly.

and then connect all wires accordingly (12v and HV). No cutting is required. Just plug n play.

5. Replace the factory-fitted halogen H7 with the new HID bulb.

Close back the splash cover. Secure HV power supply in position. DONE!


October 06, 2014

How To Repair A Broken Turbo Air Intake Hose

If you have a car powered by EP6DT type of engine, the time will certainly come when your air intake hose breaks apart around the turbo flange. Some if not all authorised@auta-rised service centers may charge you up to around RM500 to replace it if the warranty was voided/expired.

Actually you don't have to spend that much because it is quite easy to repair by yourself (it will take you in less than 30 minutes) if you already have the following items...

(Rapid Araldite (epoxy rasin), Black RTV Silocone, Super Glue, PTFE Tape, Cloth Tape/Strip (1/2" x 6") and flat/matte black paint spray-optional).

The following simple steps show in details how I repaired the broken hose on a Citroen C4 Picasso.

1. Clean the broken portions of the hose...
and then stick them up together back in place using super glue.

2. Apply a thin layer of epoxy resin around the outside surface of the damaged part of the hose.

3. Wrap around with a layer of cloth strip before the resin is set. Do NOT use fiberglass cloth.

4. Apply another layer of epoxy resin on the cloth which already wrapped around the hose end.

5. Apply a thin layer of black RTV silicone on the inside surface of the hose to improve air tightness.

6. Wrap around with three layers of PTFE tape...

7. Spray two or three coats of flat/matte black paint on the PTFE tape which is already wrapped around the hose in (6).


QED!

March 12, 2014

Downgrading to VAG Diverter Valve internal parts...

Over time plastic parts inside diverter valve become brittle and can easily  break apart or disintegrate. I fixed those broken parts temporarily using super-glue and reinforced them with araldite epoxy resin (see HERE) while waiting for a new VAG diverter valve ordered frm eBay (@RM180+).

Today, when I opened up the diverter valve for inspection and I accidentally dropped it the whole plastic internal parts disintegrated!

Luckily I already got VAG diverter valve ready in stock.
Now, I simply transfer internal components from VAG diverter valve assembly into the stock diverter valve as shown below to complete the "downgrading"*.

(Note: many ppl fail to do this just b'cos they did not remove plastic ring adjacent to the yellow O-ring).

* I use the word "downgrading" because VAG internal parts are inferior (and cheaper) in comparison with the original components designed by Pierburg for EP6DT engines (Peugeots, Citroens and Coopers).

January 17, 2013

Peugeot 308 DIY Oil and Oil Filter Change

Not everybody knows exactly where the oil filter cartridge housing is located.

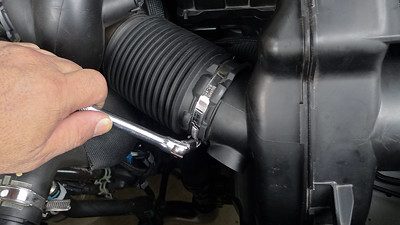
It is actually hidden underneath air intake flexible hose.
03
In order to locate the oil filter cartridge housing the resonator must be removed first (after detaching it from the flexible air hose).
04
After removing the resonator lift up the flexible hose to locate where the oil filter housing is.


Items and tools required for oil and oil filter change.
The oil filter cartridge housing can be removed with 27mm socket wrench. Oil drain plug needs 8mm allen key (not shown).

Fresh oil filter cartridge in its housing.

For those who have never DIY engine oil change please follow step-by-step procedures HERE.

How to reset Service Indicator
After changing the oil and oil filter the service indicator must be reset as fallows...
1. Turn off the ignition
2. Push-and-hold trip-meter reset button.
3. Still pushing the trip-meter reset button turn on the ignition (do not start the engine)
4. On the display will appear count down from '10' to '0'
5. After the display read '0' the service indicator (spanner icon) will disappear.
6 Switch off the ignition.
7. Done!

January 27, 2012

Taking a Brake...

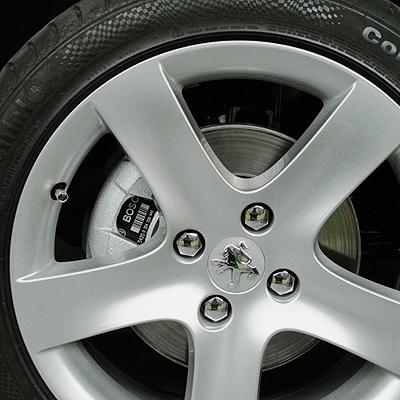
MyPeugeot308 is almost 3yrs OTR and has just clocked 50,000km. Prior to the scheduled service it is the right time to replace front brake pads even though all pads are still usable up to at least 6000km more.

comparison between worn-out and fresh front brakepads

Why 6000km more?
The answer is because the remaining pad thickness is still more than 1 mm above wear limit. For instance, by measurement the average brake pad consumption is around 1 mm/6000km. This guide is valid for genuine pads and only if 308T is not driven on busy streets [or in towns/cities] where the right foot is spent more time on brake pedal than on the accelerator!.


Ready for the installation.
There is not much wear/damage on the stock rotors even after 50,000km of 'abuse'. A little skimming job is good enough to 'recond' them.
I still prefer genuine brake pads.

DIY Installation is complete...


Click HERE for more info on brake pads/discs and to see how to remove them.

December 07, 2011

Depleted Fragrance Cartridge

Don't throw away your Depleted Fragrance Cartridge.
P1240127
You can reuse it for something that look a little canggih. You can use it as a nice looking and very practical 12v outlet cover...
P1240121-400
very ngam in size and design.
... especially when you have multiple 12v-socket extensions and not use all of them.
P1240125
If you have plenty of depleted fragrance cartridges you can use them to cover all those socket for safety and aesthetics as shown below.


Click HERE to see how to dismantle the depleted fragrance cartridge.

May 02, 2011

Pre-40,000 km DIY Inspection [cont.]

My 308 had just clocked almost 40,000km and due for periodic maintenance. Today is a public holiday and is another fine day for DIY mechanical inspection prior to sending the 26-month old 308 [OTR] to my favorite SC.

Will not elaborate further. Click HERE for similar kinda of works I did before. For record, latest photos will be posted here later ... This afternoon gonna renew insurance/roadtax.

update: Insured the car for RM80k only. The premium was RM1400++, roadtax RM90.


Tyre and Brakepad Consumptions
Main contributions to tyre and brakepad consumptions are the same as what are actually effect fuel consumption - i.e who drive where, when and how....

I drive my 308 mainly for long distances covering at least 600km return trip. Sometimes up to 2000km covering highways, trunk roads as well as state roads. Normally I drive between midnite and before sunrise. Hence the consumptions are much less than the average.

14doneA1020186
After nearly 40,000km - front brakepad had gone 6.6mm and tyre tread reduced by almost 5mm.

Consumptions:
Bosch friction pads [front]: about 1mm for every 6000km
CSC3 treads: about 1mm for every 8000km

See how to remove front brakepads

April 16, 2010

uncleDIY LED conversion bulb

1. Get the tools and materials required...
... wire cutter, long-nose plier, soldering iron, soldering lead, super bright white LEDs, 1157 base, etc

2. Solder four_LEDs in series for DRL circuit like this...
[observe where are the cathodes and the anodes], and for the sidelight solder four LEDs like this...
All together u need six sets for the DRL and one set for side light for each 1157 conversion bulb.

3. Solder each LED cathode to the 1157 base

4. Solder all the anodes together and reinforce the cathodes

5. Test....

6. Connect the anode to the base terminal using an insulated wire.

7. Solder the LED set for the side-light around the lower part of the DRL LED cluster to finish the 'assembly'.

8. Install the DIY LED conversion bulb and test run....


Related Topic on LEDs


Frequently Visited Pages:
| Home | Fuel Consumption | Performance | uncle's DIY |
Car Size Comparison | Motoring Myths | RON95 |

March 25, 2010

How to Align Peugeot 308T Headlight Beams

Light beams should be realigned every time after bulbs replacement to avoid causing a nuisance to other road users . The only tools required are 6mm allen key and 8mm socket wrench c/w ratchet handle.

LH and RH headlamps can be adjusted individually for beam height and L-R alignment.

1. Beam Height Adjustment.
Beam Height Adjustment can done by using a 6mm allen key on the adjuster as shown in the picture.
Turn the allen key either clockwise or counter-clockwise until the desired height is achieved. RH beam should always be lower than LH beam height. Repeat for another headlamp. Finally adjust LH and RH beam height simultaneously by using the remote height adjuster below steering column.

2. Beam Alignment.
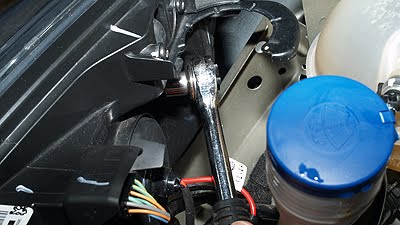
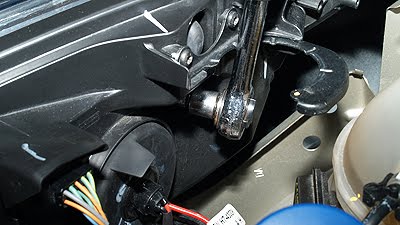
Beam alignment adjuster is actually hidden. Must locate where is it first. Even some mechanics at authorised SC who are not familiar with 308 don't know where is it!
Use 8mm socket wrench with a ratchet handle to turn the adjuster clockwise or anti clockwise to align the beam.


Screwing in [turning clockwise] the adjuster will align the beam closer to the car axis.

beams on the wall after realignment
UPDATE: Even though the alignment was done, the light beams are not 'friendly' to other road users because of the glare - worse still after installing HIDs. Finally I installed Projector Lenses to reduce glare and to improve light beam focusing.

| HOME | HID | Osram Nightbreaker | LED | All Light bulbs|| Fuel Consumption | Performance | uncle's DIY |
|Car Size Comparison | Motoring Myths | RON95 |

Last 7-day Most Viewed Pages

All-time Most Popular Posts